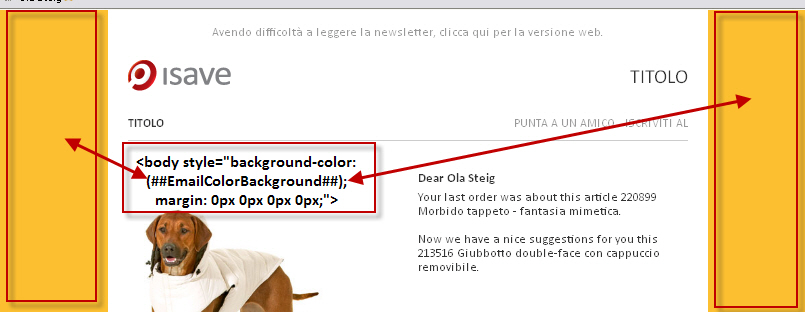
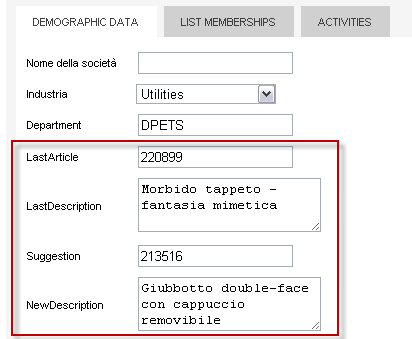
This is a short demonstration of how you could set up an email template with different content based on the receiving contact preferences. Note that all these different looks are regulated by one or more different contact demographic fields.
Segmented content
Easiest method for unique e-mail content based on parameters stored in a demographic field is the method called Segmented content. With this method you could change the entire content of the newsletter based on one or several demographic fields. You just select a element you want to filter to some of your contacts and the value of the demographic field values.
Start by selecting the newsletter module that you want to filter to a demographic field value and click the filter icon.
Select the demographic field from the first drop-down list and the value to whom the content should be shown to and press Save.
You can also use other operators for the filter like Is, Is Not, Greater Than, Less Than, Contains and Custom.
When you have inserted one or more segmented modules you may show or hide this content by pressing the show/hide button in the top of the newsletter.
The show/hide button above the segmented module will only show or hide the selected module. When a module is segmented the filter icon will turn red and the name of the demographic field and it’s value will show in the module placeholder header.
NB! to upload a contact list CSV file with a value in a demographic filed of type drop down list, check box list or radio button list you must put in the lists ID instead of the variable name in the column in Excel.
Dynamic Frame Background Color
The frame background is the color that will show up on the left and the right side of the email if the content of the email doesn’t fill the entire window of the email client (outlook, thunderbird etc). It is a good email design to have this color in a darker tone than the main content of your email. If you want this color to be dynamic, make a demographic field in your contacts database. IE. EmailColorBackground. If the contact doesn’t have a value the frame background will be white.
Remember to use a # in front of the color code: #FCBF30
This is the code for a dynamic frame background, note that the #000000 is replaced with (##EmailColorBackground##).
Dynamic Newsletter Background Color
The newsletter background is the color that will show up behind the text of the email. If you whant this color to be dynamic, make a demographic field in your contacts database.
IE. EmailColorNewsletter.
Remember to use a # in front of the color code: #FCE9BB
This is the code for a dynamic frame background, note that the #000000 is replaced with (##EmailColorNewsletter##).
Download a sample HTML code here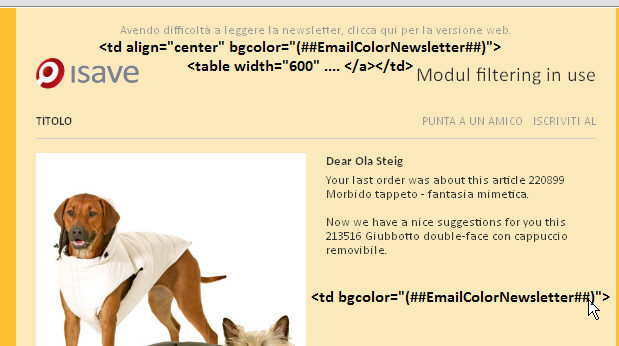
Dynamic Text Content
You can store a lot of information about your contact in text fields or text area fields on your contact and the reuse this information in text based eDM modules. IE. if you know what product the contacts last bought in your store you can store information about this product and then inform him/her about another product that might be of interest.
Go to system // Spesification // Contacts // create new. Select a field type like text area or text box.This is an example of these kind of demographic data store on the contact.
This is an example of how a text module could be formatted: Dear (##Name##) Your last order was about this article (##LastArticle##) (##LastDescription##). Now we have a nice suggestions for you this (##Suggestion##) (##NewDescription##).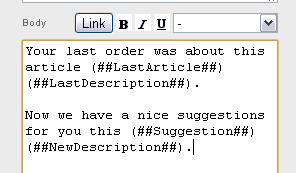
This is an example of how this code might render in the e-mail client: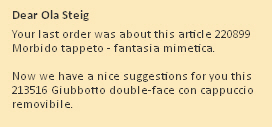
Dynamic Image Content
The easiest way to have a different images based on a contacts preferences is to break up the the paths to the images in segments relativity to the dynamic path called Templateimage. All images you upload on the eDM template can be referred to via the path img src=”(##TEMPLATEIMAGE##)”. If you add some images to the eDM template you can store information in a demographic field on your contacts on what image to use by combining Templateimage and a demographic field. Note if you don’t store the file extension in the demographic field you must also add this to your code.
This is an example of how a image path could be combined in the HTML:
This is how the info is stored on the contact:
This is where the images is stored on the eDM template:
Admin // Images // Images in Template Package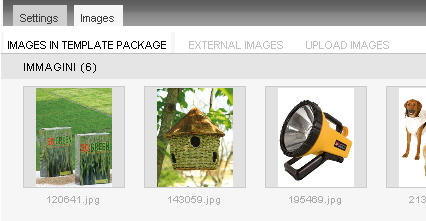
To upload images to the template you follow these steps:
1. Click the Blue Admin button on the eDM template and click the IMAGES panel
2. Click the UPLOAD IMAGES.


