The following section guides you through the fundamentals of the system. The aim is for you to quickly get an overview of the functionality. For detailed descriptions, please refer to the appropriate sections later in this resource center.
• Creating a new newsletter
• Create content – Edit
• Organizing content in newsletter
• Preview your newsletter
• Save your newsletter
• Send your newsletter
• Reports
The frontpage
Only the administrator can add new templates and change settings on existing templates.
Read more about setting up an isave.eDM template here
We will now cover the three most commonly used functions for a typical end user.
Creating a new newsletter
1. START BY CHOOSING A TEMPLATE
After clicking on the isave.eDM button in the main menu you will see a page that gives you direct access to all existing templates.
Note that eDM templates can also be organized into folders, click on the folder to see the underlying templates.
2. CREATE NEWSLETTER
After selecting the desired template, type the title of your newsletter and click on the CREATE button.
Note that the title can be changed later and it is used as the title of the document which will initially be used in the subject line of your email sent to the contacts unless you specify a separate topic in the subject field . This can be done in either the edit mode or when sending your newsletter.
3.CREATE CONTENT – EDIT
Select EDIT NAME to change the name / subject (if subject field is empty when sending, the name field will be used).
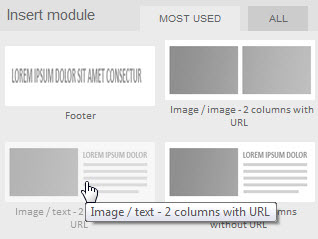
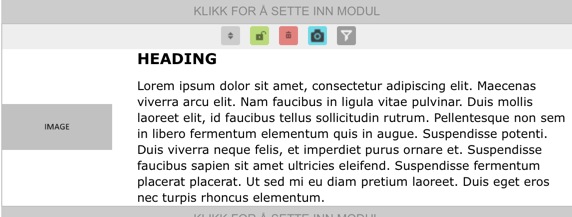
Click Insert module here to insert a module. A newsletter / eDM are often built up of modules. Each module contains one or more articles which contain text and image. A newsletter can contain any number of modules.
Select the module you want to insert in the newsletter from the list on the right (shows up when you click Insert module here)..
4. ADD TEXT
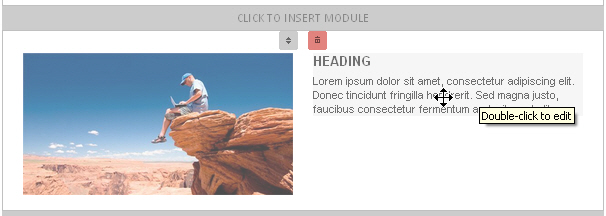 Double-click on the text you wish to edit.

Enter the text in the text fields in the right hand column. The newsletter will update as you type.
5. ADD IMAGE
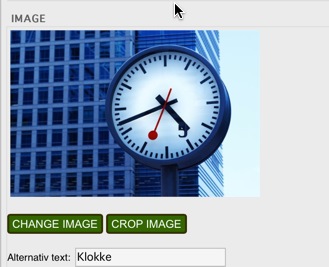
Double-click on the image you wish to edit.
Click the Change Image button at the bottom of the image in the right column.
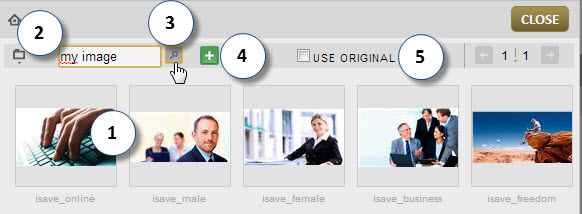
Then the image selector will open and you will have different options to choose images:
1. Select the photos that have been prepared by the administrator for this eDM template (click on the image).
2. Select the image folder from the dropdown menu and click on the image.
3. Search for images in the search field and click on the image.
4. Upload your photo directly (only templates where this feature is turned on). These photos will lie under the Personal Images menu item under FILES.
5. Check the USE ORIGINAL checkbox to use the original uploaded file (eg. if it is a file that uses transparency).
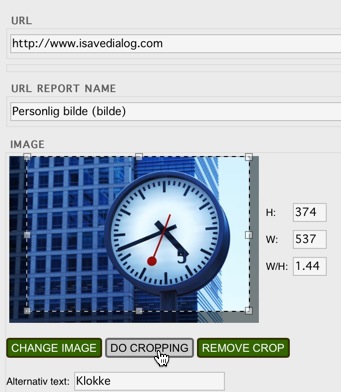
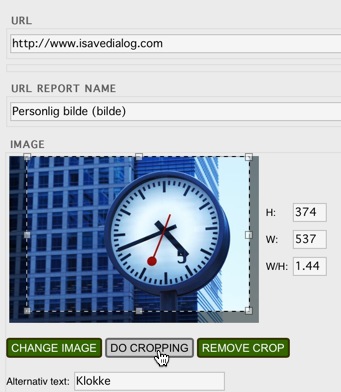
You can also crop an image by moving the square that marks the crop box and click the button Do cropping. Note that the image is not cropped unless you click on the button Do cropping. Text that is entered into the field labeled Alt (Alternate text) is displayed only if the recipient of the newsletter have blocked the display of images in his e-mail client. The URL link field is used for addresses connected to a image in the article and the URL report name is the click record name for this URL. PS use unique name in all your URL report name fields to differ between the link clicked in the eDM report.
5. ADD LINK
You can add the links in two ways isave.eDM: in the text editor or associated to images with designated URL input fields.
ADD TEXT BASED LINK
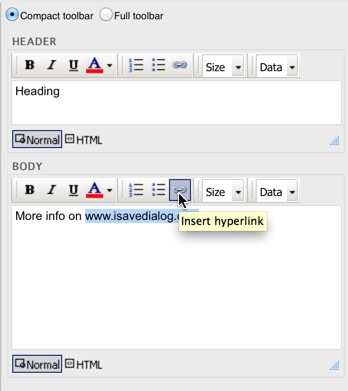
In a text box, mark the text you want to be converted to a link and press the LINK button.
You have three different types like to choose from: URL, PURL and Personal Print Document (PPD).
Choose URL for common internet links (note that the functions PURL and PPD requires isave.edialog or isave.dialog+ licenses)
Fill out all three fields:
URL = Your Internet address (remember http:// this does not start with www)
Title = The text on the link in your newsletter
Name (for reports) = The name that appears in the report for the mailing of the newsletter (use unique names per link).
Click the ADD button. You will not see the title text before you add a new module, or save the newsletter.
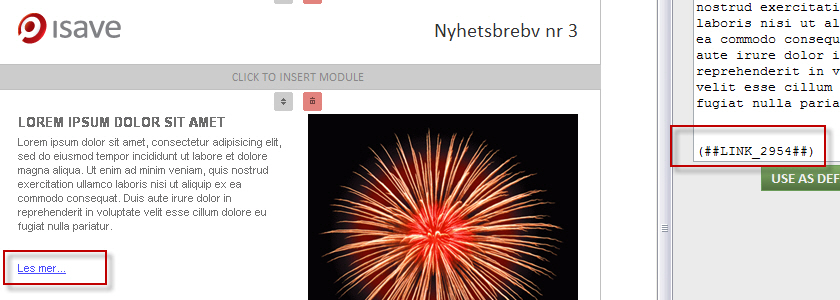
This is how a text based link will appear in your newsletter.
Note that you can change the look of these links by adding a CSS style in the Link Style field (under the isave.eDM Admin).
Note that PDF files from the isave.Campaign (Personal Print Document – PPD), are automatically deleted from isave after 14 days.
ADD IMAGE BASED LINK
Double-click on a picture and fill in the fields URL and URL report name.
URL = Your Internet address (remember http:// this does not start with www)
URL report name = The name that appears in the report for the mailing of the newsletter (use unique names per link).
Alt = Field of alternative description of the link / image (shows in the e-mail clients before you have loaded external images).
If you need a image link to the features PURL or PPD the first thing you do is to make a regular text based link in a text field and use the code(##LINKURL_XX##) (and change the XX with the ID from the link).
Note that PDF files from the Campaign, Personal Print Document – PPD, are automatically deleted from isave after 14 days.
ORGANIZE CONTENT IN NEWSLETTER
You can reorder the modules in the newsletter by clicking and dragging on the navigation icon (see diagram) ![]() .
.
Watch the video how this works
It is also possible to move items, click to drag an item and drop it over another article. The articles will then switch places. NB! article will appear in accordance with the layout of the new location. This can, for example, mean that an article will appear in a picture layout without a picture and thus will appear as if it is without content.
Watch the video how this works
PREVIEW YOUR NEWSLETTER
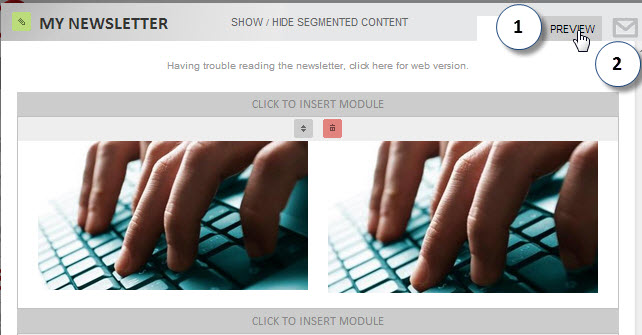
1. Press the PREVIEW tab to hide all placeholder end editing elements and just show the eDM content. Choose between mobile, tablet and desktop preview.
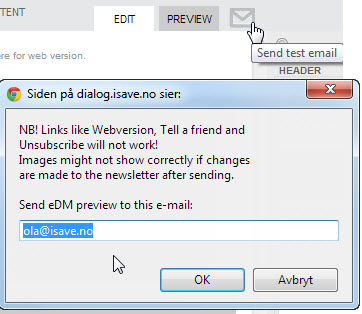
2. Press the envelope icon to send a preview mail to your in-box (default e-mail from user log-in). This preview method will only work correctly when the editor is open. Temporary images from the editor will be deleted upon editor exit and thus make the e-mail preview obsolete (some images might be stored in e-mail client cache).
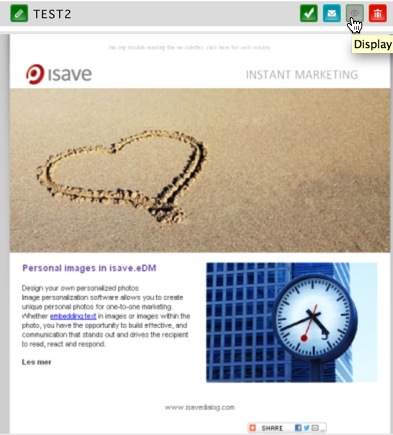
A visual preview of the e-mail is available outside the editor as well. Click the DISPLAY eDM icon (green eye icon) in the element preview tab (no links will work in this preview).
SAVE YOUR NEWSLETTER
You can press the SAVE button during the eDM editing and the editor will stay open.
When you are finished editing, click on the SAVE & CLOSE button. This will update the newsletter with the changes you have made and create a preview.
Clicking CANCEL closes the newsletter without saving the latest changes.
SEND THE NEWSLETTER
Note that you can send a preview e-mail to yourself by clicking on the envelope icon.
Enter an e-mail address in the pop-up box and send a preview to yourself or a colleague.
To check that the links are working properly and that all links have unique report names we recomend you to send a preview e-mail to a test list before sending the e-mail to your contacts. Follow procedures of e-mail sending below.
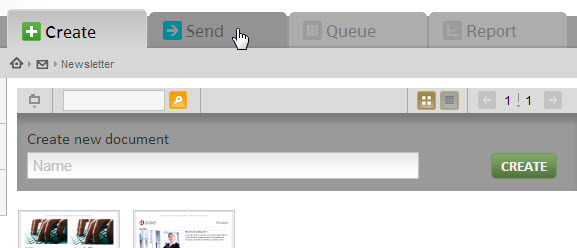
To send your newsletter, click the Send tab .
1. Select the newsletter you wish to send.
2. Select the list of recipients you want to send to.
3. Enter the date and time of mailing the letter.
Please note that the time initially set 5 minutes ahead in time compared to when the tab SEND was opened. If you want an immediate broadcast (eg. Preview for yourself) set the time to a value before current time.
4. Change the sender name and e-mail (optional).
Please note that you can’t change the sender domain of an e-mail. If you have to use another sender domain please contact an administrator to change the domain in the template setup.
5. Change the subject line for the e-mail (optional).
6. Click the Send button to put the e-mail in the queue for mailing.
Please note that you can change the time and date in the Queue tab by clicking the edit icon.
Note that you need to create a contact list with at least one touch before sending an e-mail. The return address should also be a real e-mail address to avoid e-mails sent end up in spam filter at the receiver. The sender name can be either the name of a person or company, but it should consist of two words such as ‘John Doe’ or ‘Company, Inc.’ to avoid problems with spam filtering .
CREATE A CONTACT LIST AND ADD CONTENT
To make a contact list start by pressing the Contacts icon in the left menu.
Select the List Group that you want add your list to by clicking its name, the default group is named Lists.
You can also add a new group by pressing the green pluss icon, give the group a name and press the Create button.
Once inside a List Group you add a new list by pressing the green pluss icon.
Give your list a name and press the Create button.
Click on the name of the created list to see the content and to add new contacts.
Add just one contact
Enter your contact name in the box and press the Create button to just add one contact.
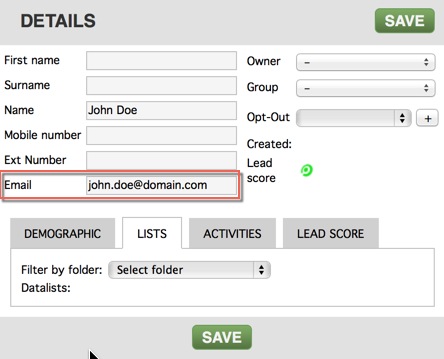
Fill out the appropriate fields (only Email is required) and click Save.
Look at the chapter about demographic data fields.
Importing contacts to a recipient list
The most commonly used method for adding contacts to a list is by importing CSV files. See the method below and this chapter for troubleshooting CSV files.
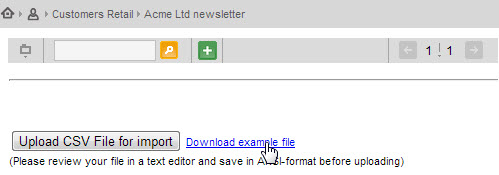
Start by downloading a CSV sample for the column header names. Click the Download example file link
Open the file in Microsoft Excel or Open Office.
Fill out the demographic data needed to your e-mail dispatches (only email is mandatory, but we also recommend Name or First Name and Last Name). The reason for having separate fields for name, first name and surname is to be able to have the choice to merge all or part of the name in the email and print templates to vary how personal you should be in your communication with the contact. If you already have a contact list in Excel format, we recommend that you always copy the column names from the sample list into your existing Excel file (this is optional as you can also connect the column names for the CSV file is uploaded, but do this in Excel file you know that the file to upload is correct).
When you have a complete Excel file with correct column names, you can save this as a normal XLS format (for backup) before you export the file as a CSV file (Comma Separated Values).
Select Save as and choose Other format or click the F12 key.
Type in your file name and select CSV (Comma delimited) *.csv as your format and press Save.
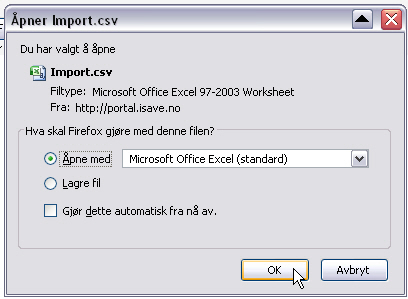
You will be prompted with a dialog box, press Yes.
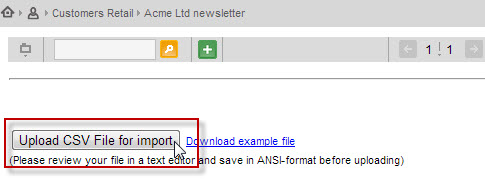
Upload CSV file into isave by clicking on the button Upload CSV file for import.
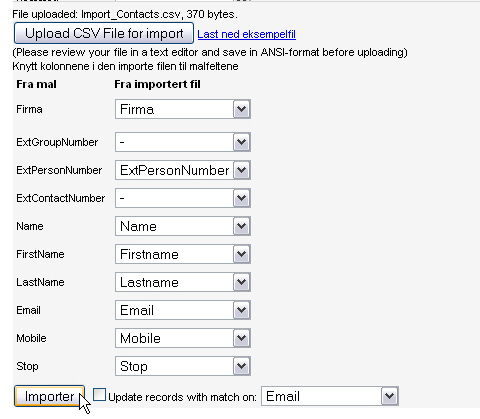
Click the Import button to import your data. If you have used the same column names as in the example file, all columns will be automatically linked. Otherwise you can connect the columns in your document (from the imported file) with the corresponding columns in isave (from template).
If you are updating existing contacts with new data, check the check box labeled Update records with match on, and select Email or ExtContactNumber as an identifier for the update of the data.
Reports
After sending the e-mail is complete, there will be generated a report on how the transmission went. This report is dynamic and will be updated as newsletters opens and contacts clicks on links in the newsletter.
Click eDM in the left menu and the Report tab. Each transmission has three icons to the right of the row. The envelope ![]() icon takes you to the email that was sent. The silhouette
icon takes you to the email that was sent. The silhouette ![]() icon takes you to a detailed report of what contacts have pressed what links, not opened, opened, not received, received, have subscribed, have not subscribed etc. The third icon is Report Viewer. The
icon takes you to a detailed report of what contacts have pressed what links, not opened, opened, not received, received, have subscribed, have not subscribed etc. The third icon is Report Viewer. The ![]() icon opens a complete and visual report of the consignment which one shows the big picture about the sending.
icon opens a complete and visual report of the consignment which one shows the big picture about the sending.
Processed report
Here you can see the actual people who opened the email and what links they clicked on. Click the person icon to see the name of the browser and the Excel icon to download the names in an Excel file.
| Opened emails = Have downloaded the pictures in e-mail | 124 | ||
| Not opened emails = Har not downloaded the pictures in e-mail | 1528 | ||
| Active subscibers = Have clicked on a link in the e-mail | 39 |  |
|
| Not active subscibers = Have not clicked on a link in the e-mail | 85 |
Reports
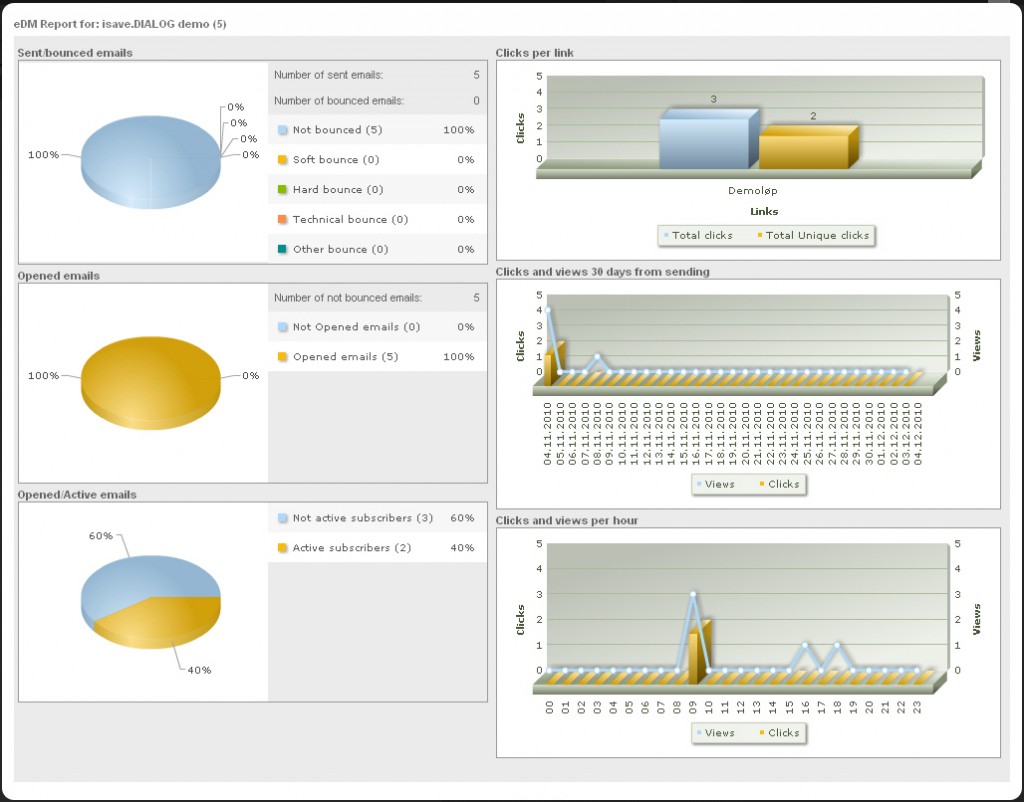
This report shows sent and rejected consignments, emails opened, active subscribers, and what links that are clicked on and the date and time of those clicks.
Bounced = is used to describe an e-mail that has bounced back to the sender undelivered
Not Bounced = is used to describe an e-mail that is delivered
Soft Bounced = is used to describe an e-mail that has bounced back to the sender undelivered after it has already been accepted by the recipient’s mail server.
Hard Bounced = is used to describe an e-mail that has bounced back to the sender undelivered without having been accepted by the recipient’s mail server.
Technical Bounced = (which is considered a type of soft bounce) occurs when the email server rejects the email due to technical errors, such as a data format or network error.
Other Bounced = the email did not reach the receiver of unknown reasons.
More info about eDM tracking and on Google


