• Your most important resource – the subscribers
• How the subscriber archive works in isave.eDM
• Demographic data
• Importing subscribers with demographic data
• Deleting subscribers
• Create a filter
• Use a filter when sending a newsletter
• Create a selection of subscribers
An important part of the work isave.eDM is the handling of information about subscribers in your e-mail mailings. Subscribers are recipients who have by signing up, showed their interest in your products and your company or organization. Of course they deserve to get the correct information. Should they, for any reason, no longer be interested, they should of course not receive any .
It is very important that the subscribers that you do till the recipients of e-mailings have given their permission to receive emails from you. This is a statutory requirement, ethically crucial and a requirement according to the terms of use that apply to use of isave.eDM.
A permission to send newsletters to a recipient is a vote of confidence. Do not abuse this trust, aim rather to respond to it in a way that is valuable to the recipient.
How the subscriber module is organized
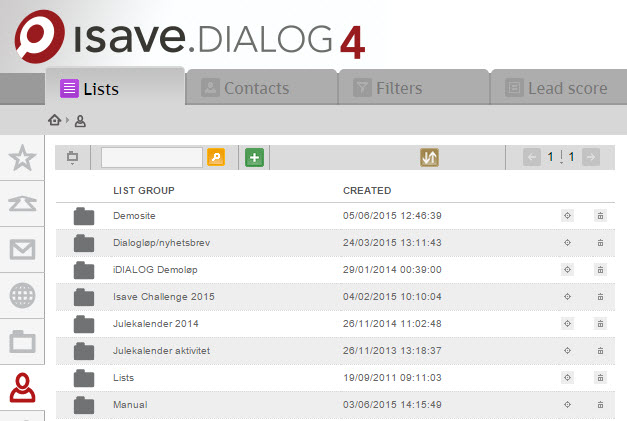
The List tab is for managing the contacts lists (uploading, updating, adding manually and edit specification fields). You can organise the lists in folders that can be access controlled to one or several groups or administrator only.
If you click on any list you can also access the global lists for bounce and opt out.
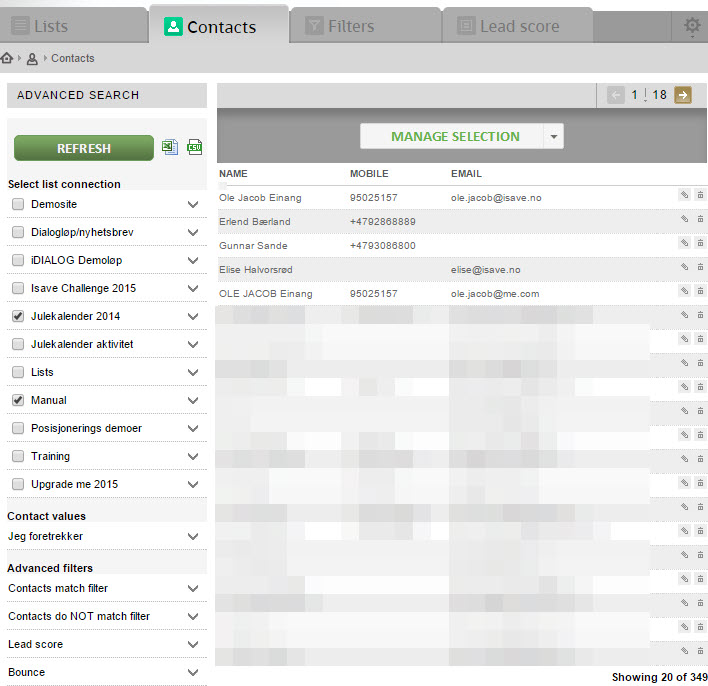
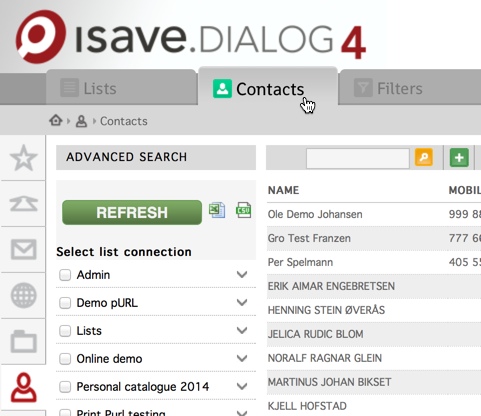
The Contacts tab is where you manage your contacts selections. You can merge lists, add and remove from lists. Add lead score. Match contacts based on built in and custom filters.
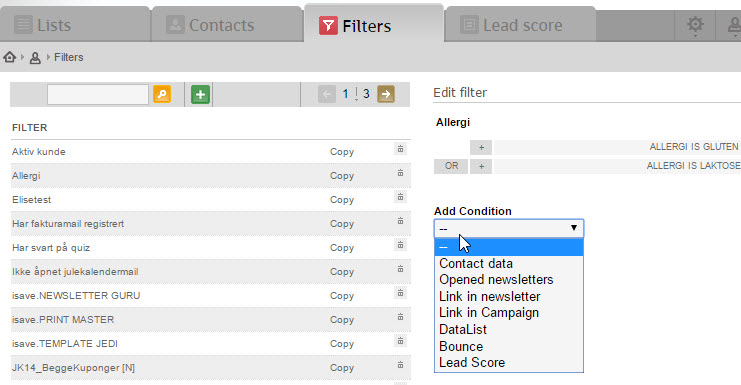
The Filter tab is where you can build your custom filters based on demographic data, opened newsletters, clicked links, data list dependency, bounce and lead score.
More information about filters here
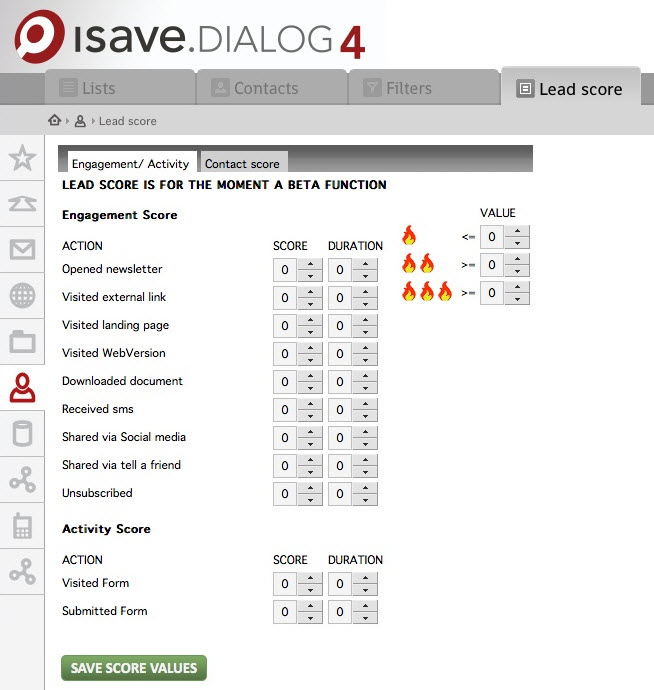
The Lead score tab is where you set up your lead-score rules and settings and activity score. By using lead scores you can see how committed the various contacts are.
More information about Lead Score here
How the subscriber archive works
isave.eDM allows you to save information with your subscribers that helps you supply them with relevant content in your newsletters.
By default the archive is set up with the following 5 fields:
• The subscribers name
• The subscribers fist name
• The subscribers last name
• The subscribers e-mail address
• The subscribers mobile phone
In addition, you can create additional fields to hold information that helps yousegment your subscribers when you do your send outs. (Demographic data).
The unique identifier in the archive is not e-mail address but a unique ExtContactNumber.
Each subscriber may belong to (or subscribe) one or more mailing lists in your account. In some cases, a subscriber does not belong to any lists (for example, if a list is deleted). He or she will then fall under the category “Contacts list without affiliation”. Another possibility is when a subscriber has chosen not to receive newsletters from your account, he /she is then added to the “Opt-out list “. This list is used to ensure that subscribers who have chosen not to receive newsletters never, at least from your account, you will receive newsletters from the system.

• One subscriber / contact per row.
• The document must have a header row. Use only letters a-z and numbers – no special characters or spaces.
• Do not import subscribers without e-mail address in isave.eDM (except for use of the isave.CAMPAIGN and isave.PRINT).
• Avoid using formattng of cells, macros or other functionality.
To import an Excel document, do the following:
The most commonly used method to add contacts to a list is the import of CSV files.
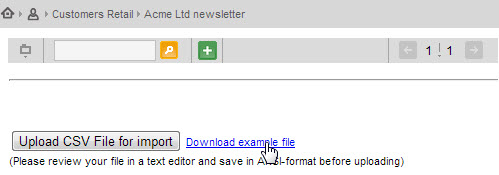
Start by downloading a sample on the column names. Click on the link Download Sample.
Note that this file will change if you add new fields for demographic data, and you should have added these fields before you import your contacts.
Learn how you add a new specification field here:
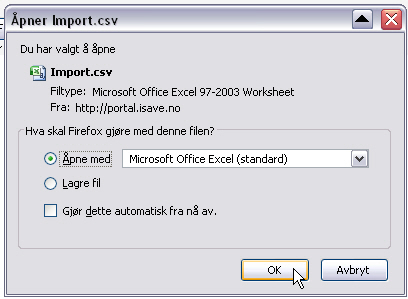
Open in Microsoft Excel or Open Office.
Fill out the demographic data needed for your e-mail dispatches (the only required is the e-mail and Name or First Name and Last Name). The reason that you have separate fields for name and first name and surname is that one should have freedom of choice to merge all or part of the name of your mail and print templates to vary how personal you should be in its dialogue with the contact. If you already have a contact list in Excel format, we recommend you anyway and copy the column names from such list into your existing Excel file (this is optional because you can connect the column names for the CSV file is uploaded, but do this in Excel file you know that the link is correct).
When you have a complete Excel file with the correct column name, you can save this as usual xls format (for backup) before you export the file as a CSV file (Comma Separated Values).
Choose Save as / Other formats or click the F12 key.
Select the file name and format CSV (Comma delimited) *.csv and press Save.
On the question of whether to change the format, press Yes i fyou have taken a backup of the file, click No if you do not have it and save the file first as a XLS (for backup).
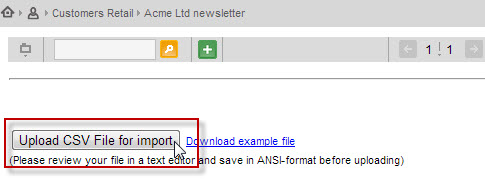
Upload the CSV file into isave by clicking on the button Upload CSV file for import.
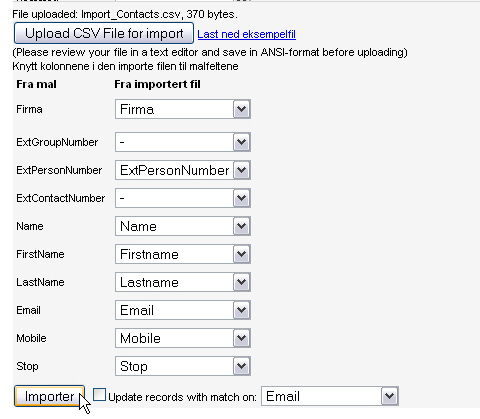
Click on the Import button to load the data. If you’ve used the same column names in the sample file in the CSV file that is uploaded all the columns will be linked automatically. If they are different so this is where you link them manually by selecting from dropdown lists the values in isave
that correspond with the values in the CSV file.If you are updating existing contacts with new data, select the checkbox that says Update records with match on: and select Email or ExtContactNumber as unique ID for the update data.
Deleting subscribers
To remove or delete subscribers from a list, click Contacts // Lists. Choose the correct list.
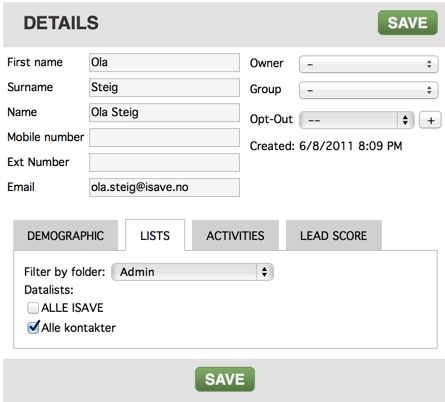
If you want to remove a specific contact from a list, click on the name of the contact, and uncheck the check box in front of the list you want to remove the contact from. The overview of lists that a contact is a member of can be found under the tab Lists.
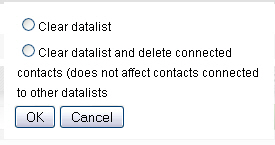
You also have the opportunity to clear a data list by clicking on the button CLEAR.
You will then have two choices: 1 Clear data (remove all contacts from the list) and 2 Clear data and delete contacts connected (does not affect two contacts connected Other data lists), this choice clear the list AND delete all contacts (with the exception of the contacts that are linked to other data lists in your company).
You can also delete individual contacts by clicking on the trashcan icon in the contact list view.
Create a filter
A useful feature to send a new adhock message to some people on a list is to send a eDM to a limited selection on the list.
This can be done in two ways: by using a filter or by making a selection.
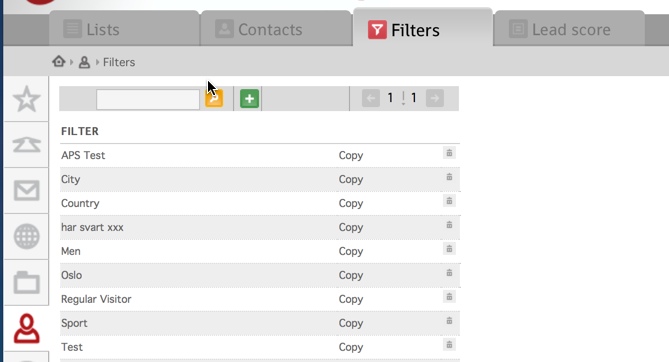
To create a filter, click Contacts // Filters.
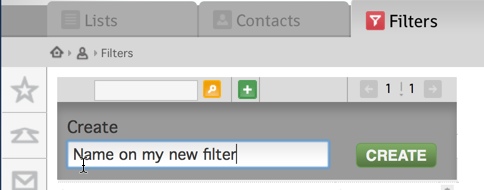
Enter the name of the filter and click on Create.
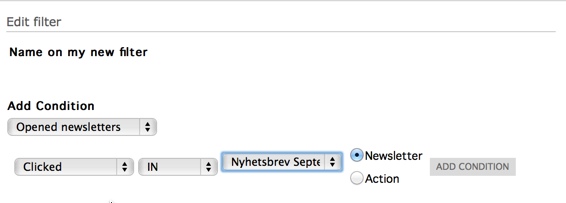
Here you have the opportunity to select specific values for some demographic data, if the news letters have been opened or not, or whether the specific links in the newsletter is clicked or not.
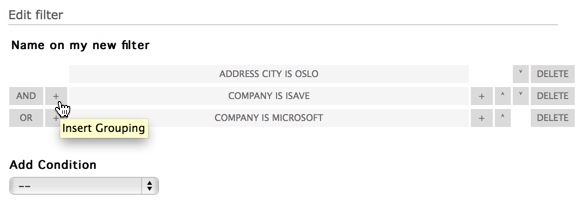
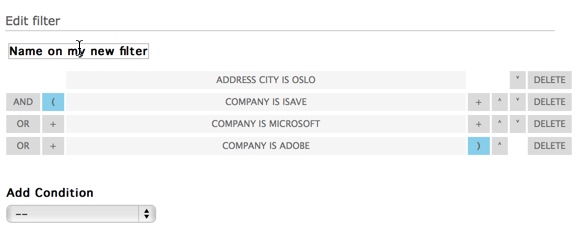
You can also use complex queries based on more than a demographic field by using parentheses to group all or queries.
If, for example, you want to send an e-mail to all persons that live in Oslo, who is working in iSave, Microsoft or Adobe you have to put parentheses around the query regarding the demographic field Company name which has OR as a condition for the query. Brackets is started by the first parameter after an AND condition and ends after the last parameter in the query. Parentheses are being used differ between the AND and OR condition in queries. See the example below.
Filter for content within a text-area box
If you can not make use of an exact value in the filter because the demographic field is of type text-area box and because the content varies from contact to contact, you must create a custom filter that searches for a part of the contents in the field. In our demo example, we have contacts with a text-area box that contains a variety of music genres that the contact has specified in a questionnaire and the content varies from contact to contact.
To create a filter that only send the newsletter to those who like the genre Rock, you can’t just make a filter that says the demographic field of music interest is like Rock, because as the example shown above the text-area contains multiple music genres like Hip-Hop, Rap and Rock. You must therefore create a filter for each of those genres.
Here is the recipe for making the filter for the genre Rock.
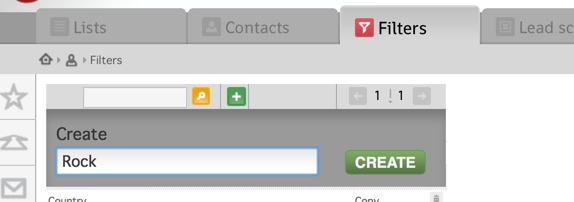
Go to Contacts // Filters , type Rock in the tekst box and press the CREATE button.
Choose Category Contact data under Add Condition.
Choose the field Music Interests and use the following syntax:
AND SpecfieldValue LIKE ‘%Rock%’
Press the ADD button and click SAVE.
Repeat for the other filters, but replace the word Rock (highlighted) with the other genres.
Now you can send out a newsletter only for contacts that are interested in Rock or Jazz. You can also select two filters. Note that the number of contacts with a unique email address and hit on either filter Jazz or Rock will appear in the column list. Note also that the default operator is AND. That must be changed to OR if you want to send to contacts who have either Rock or Jazz as its preference. If you just want to send to contacts only meets both preferences keep the operator AND.
Create a selection of subscribers
A useful feature to send a adhock message to some people on a list is to send a eDM to a limited selection on the list. This can be done in two ways: by using a filter or by making a selection.
To create a selection from a list, click Contacts // contacts.
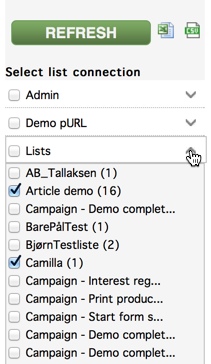
Start by choosing the list that you want to make a selection of. You can select the list group lists as a whole, or you can choose one or multiply lists in a list group. As shown under. Press the button Refresh when you are finished.
You can export the selection to a CSV file that you receive on the registered e-mail address associated with your login.
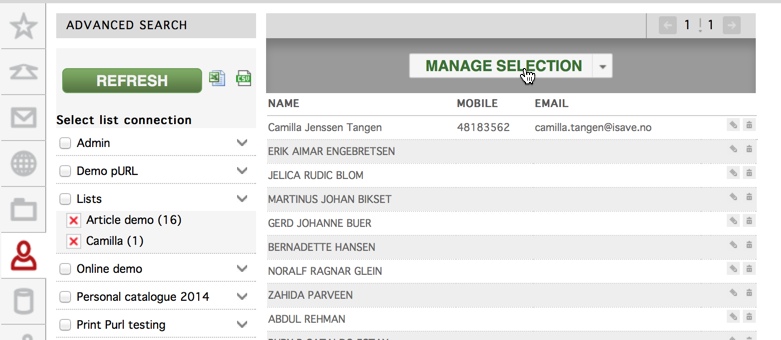
It will now look something like this, with your selection to the right.
If you click on Manage selection, you get some different choices.
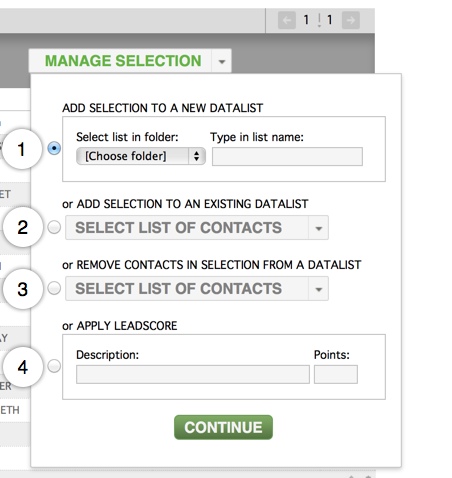
1. You can use your selection to make a new list and put it in a chosen folder.
2. You can add your selection to a existing list.
3. You can remove your selection from a list.
4. You can a apply lead score to your selection.
Note that if you delete a person from your selection, you delete it from the list.

